Heraldic Parade Shield by Ciana di Carlo after Seedorf Shield

Heraldic Parade Shield

Inspired by the 13th Century Swiss Seedorf Shield, bearing the arms of Sir Arnold von Bienz. 
Heater shaped poplar plank base, covered in linen, gesso, pastiglia relief work, genuine silver, egg tempera paint. 
22 x 32″
Copyright Ciana di Carlo, 2020

The Project

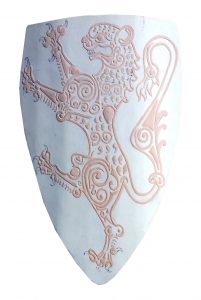
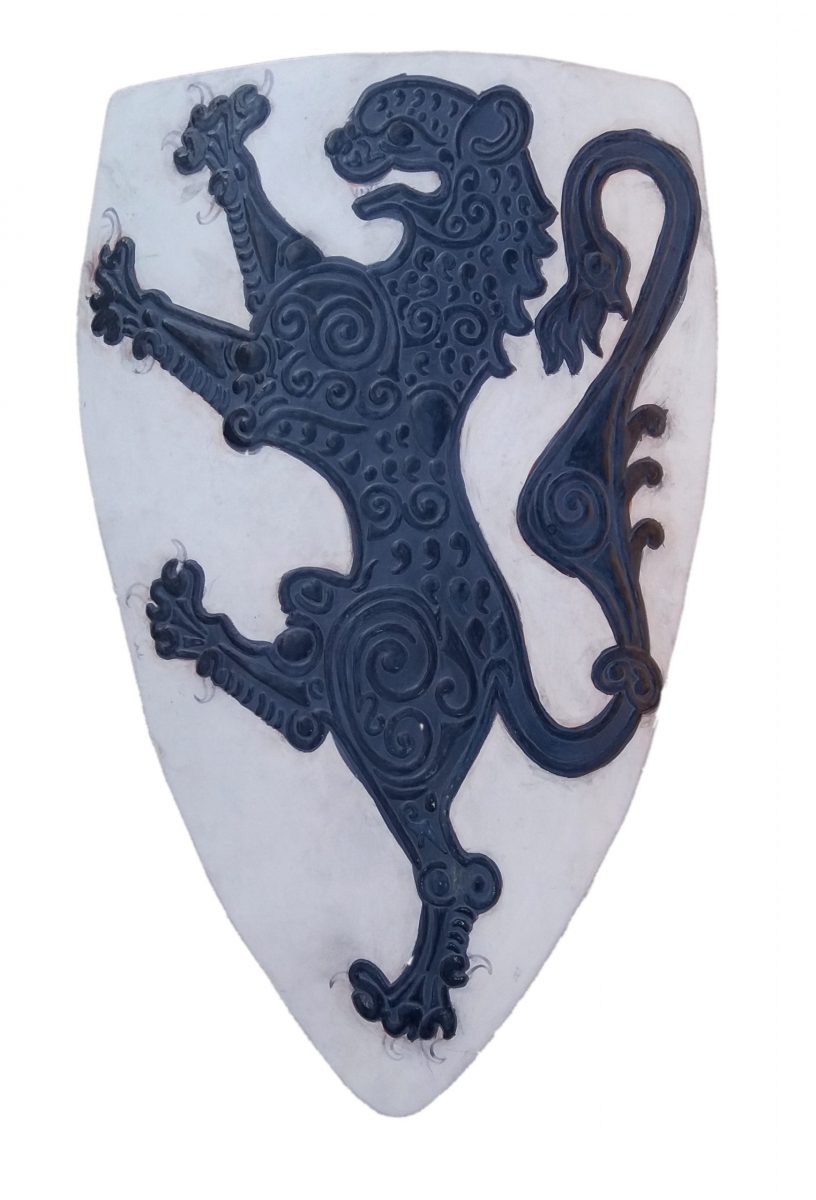
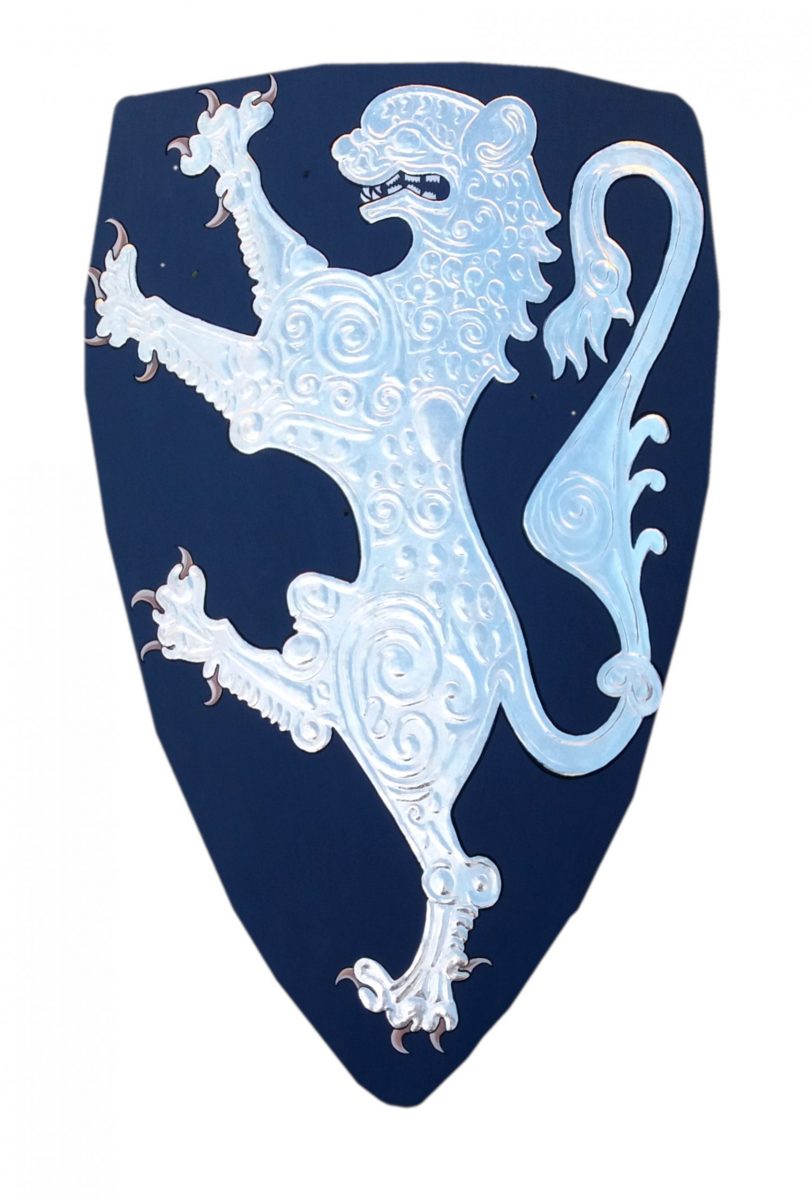
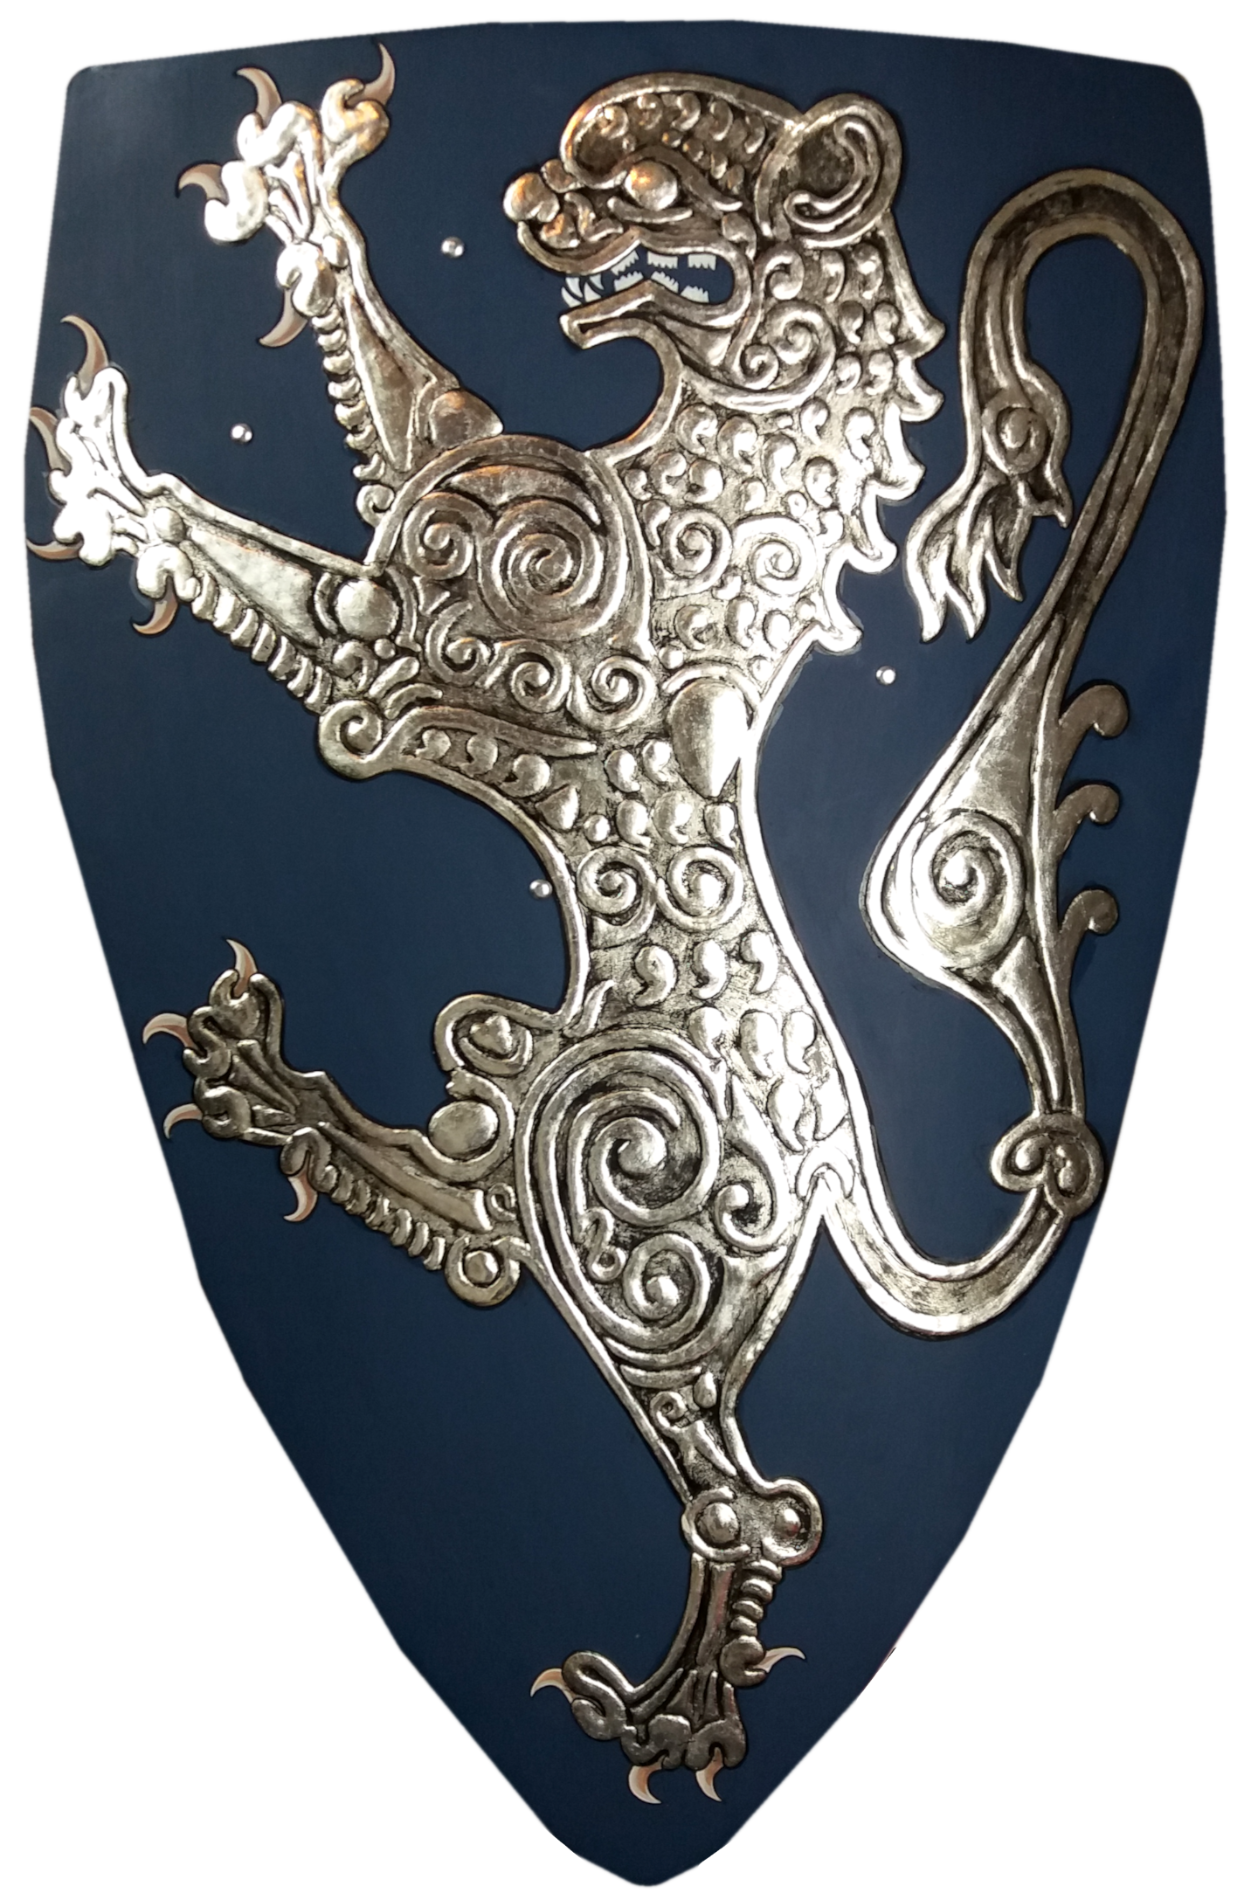
Description: Create a 13th-14th Century heraldic parade shield in relief using period techniques and materials.

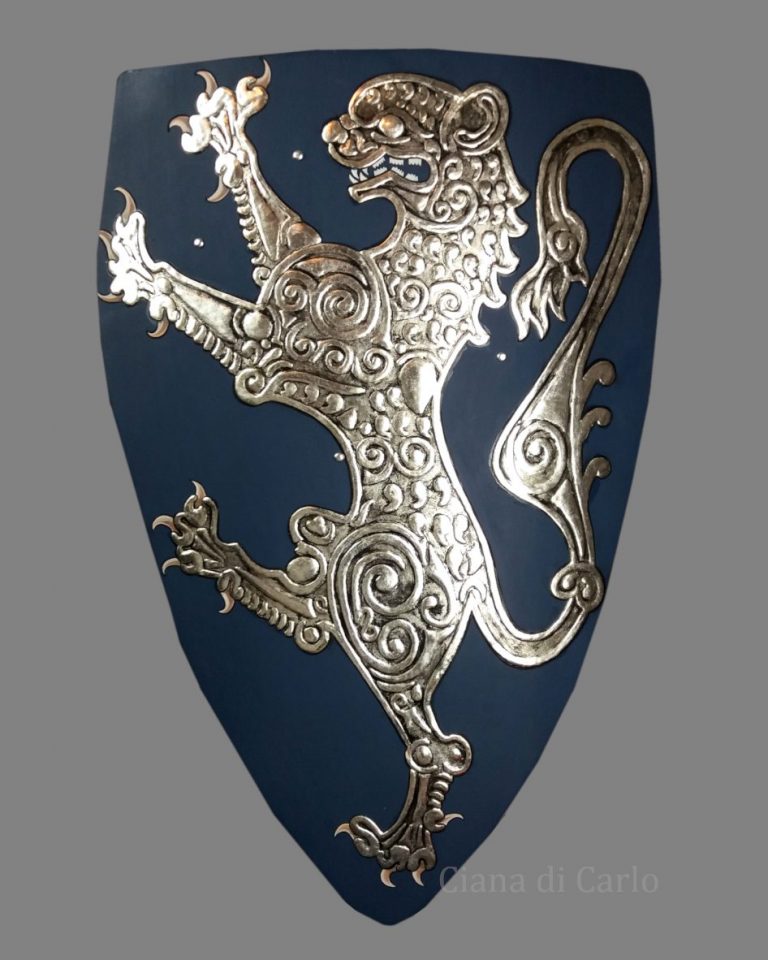
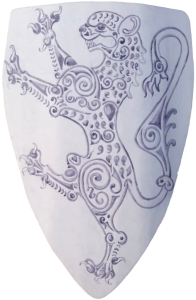
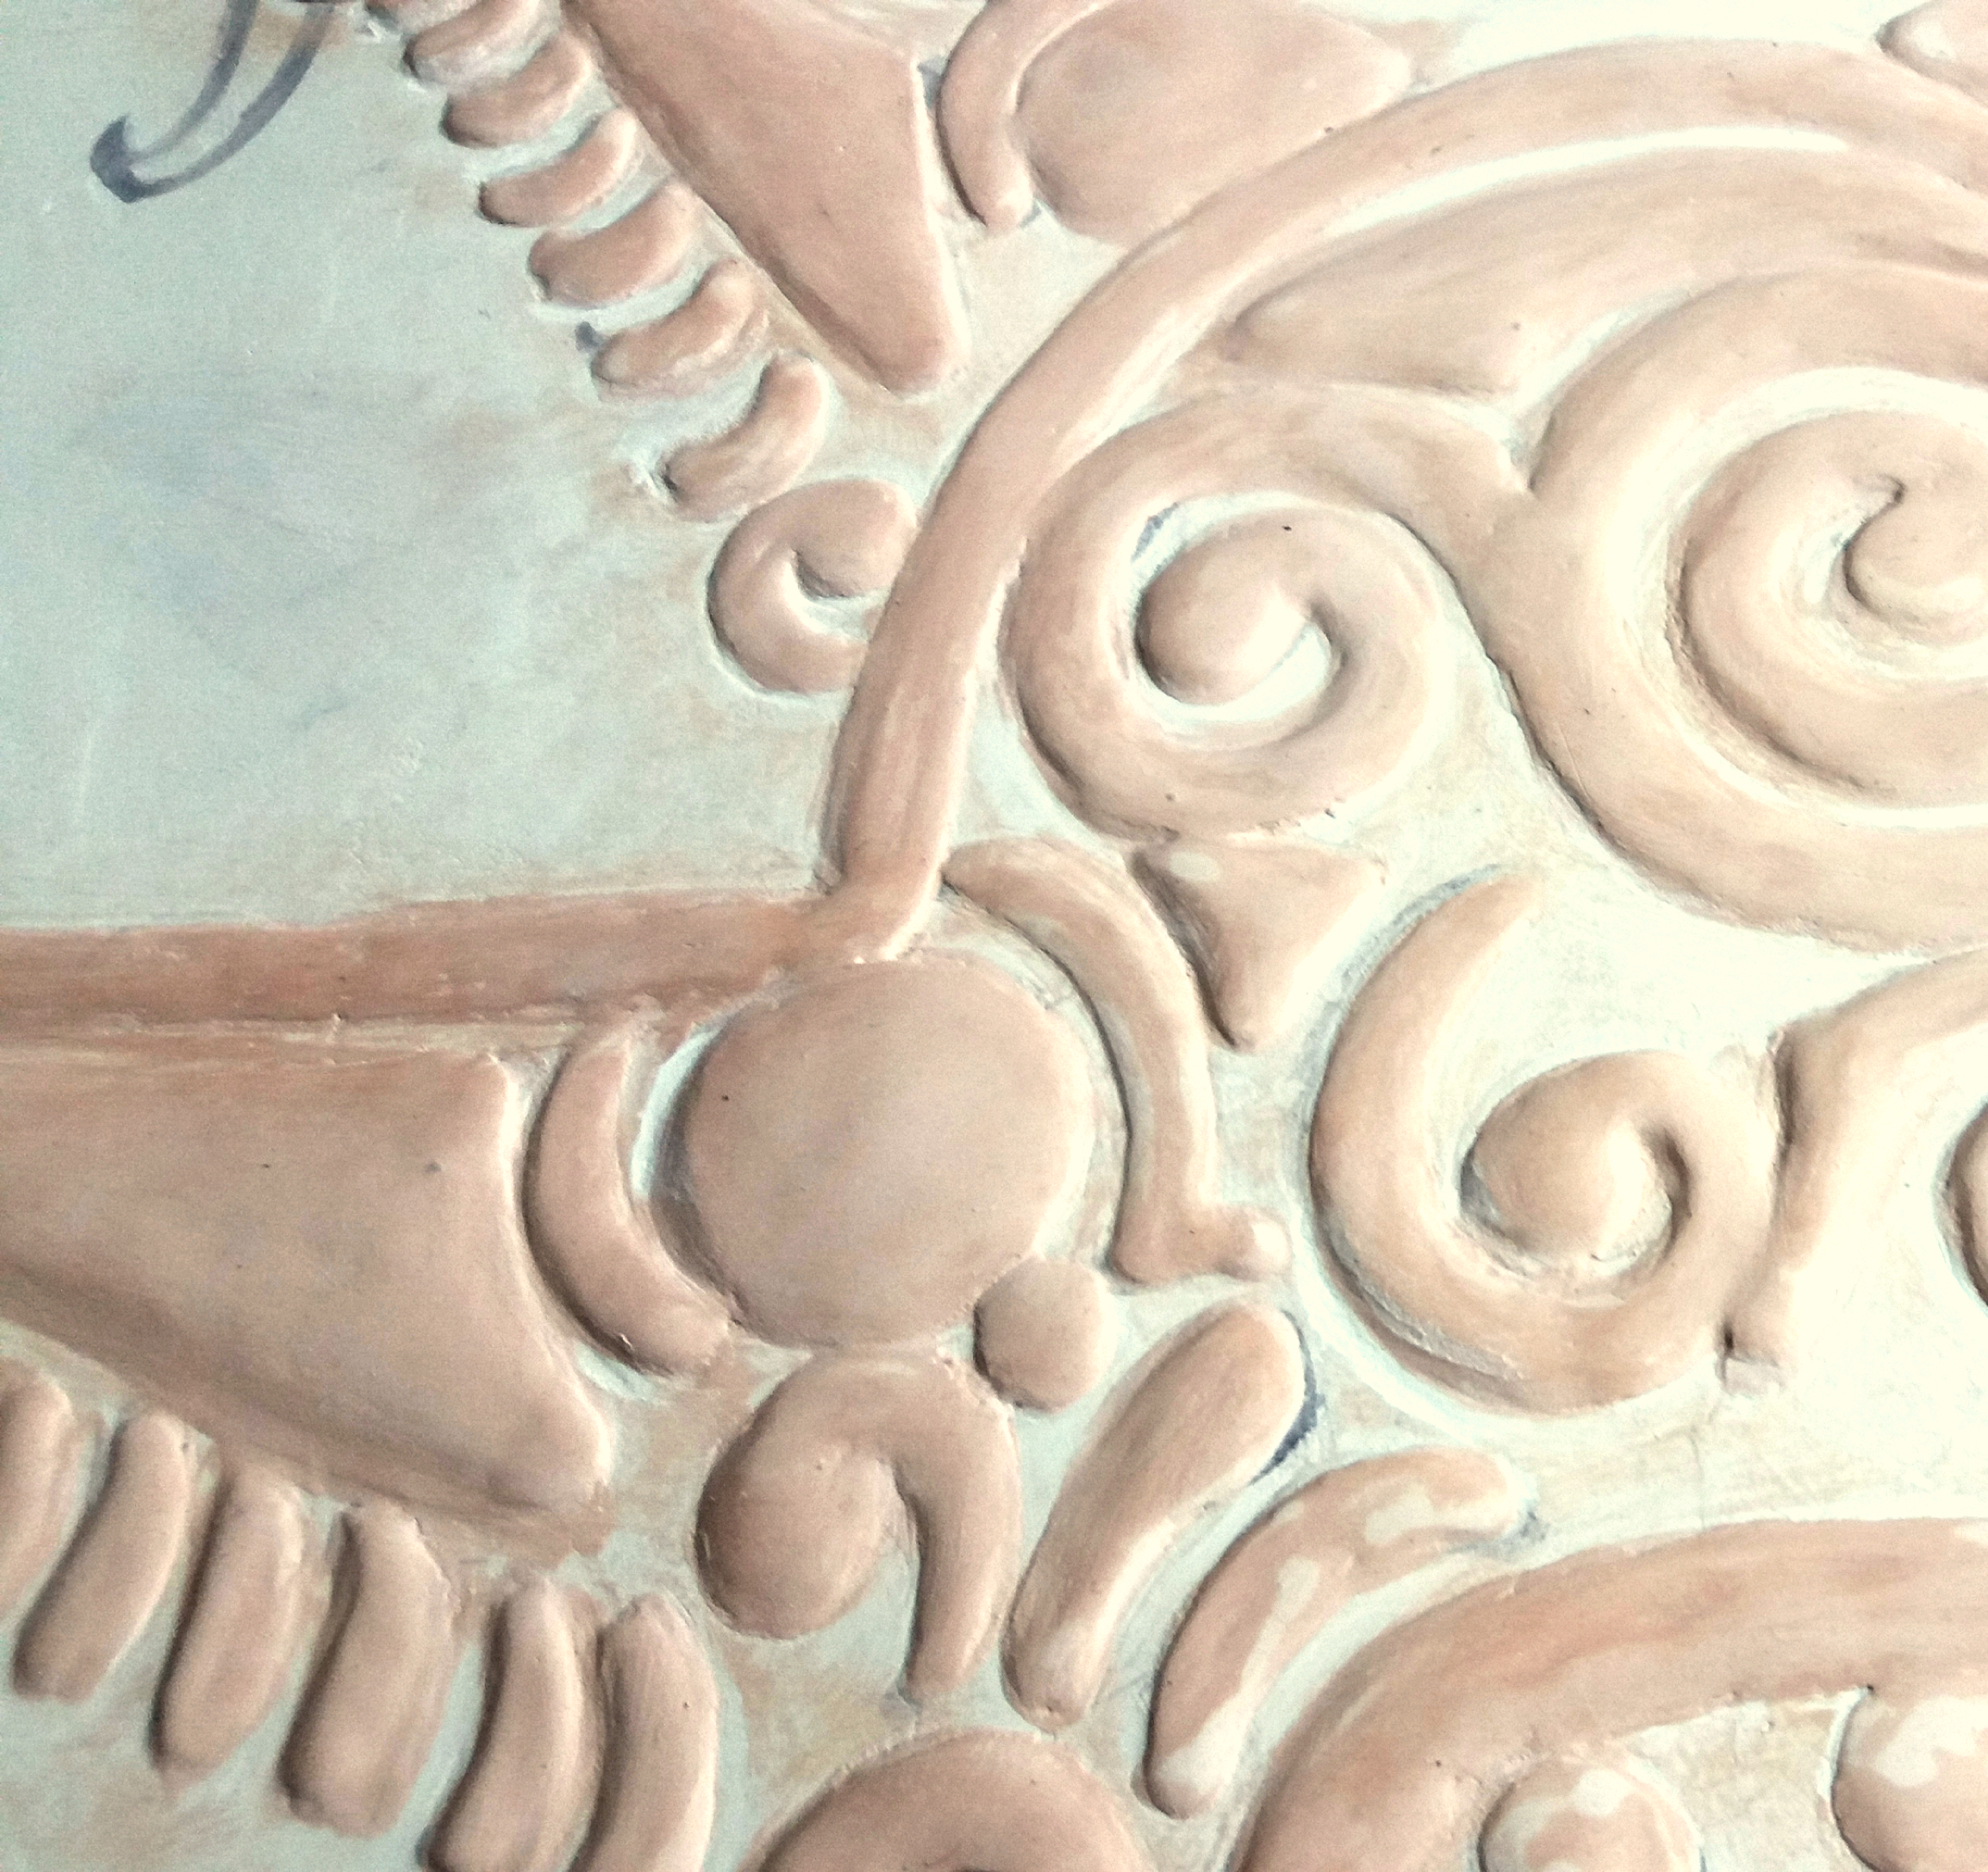
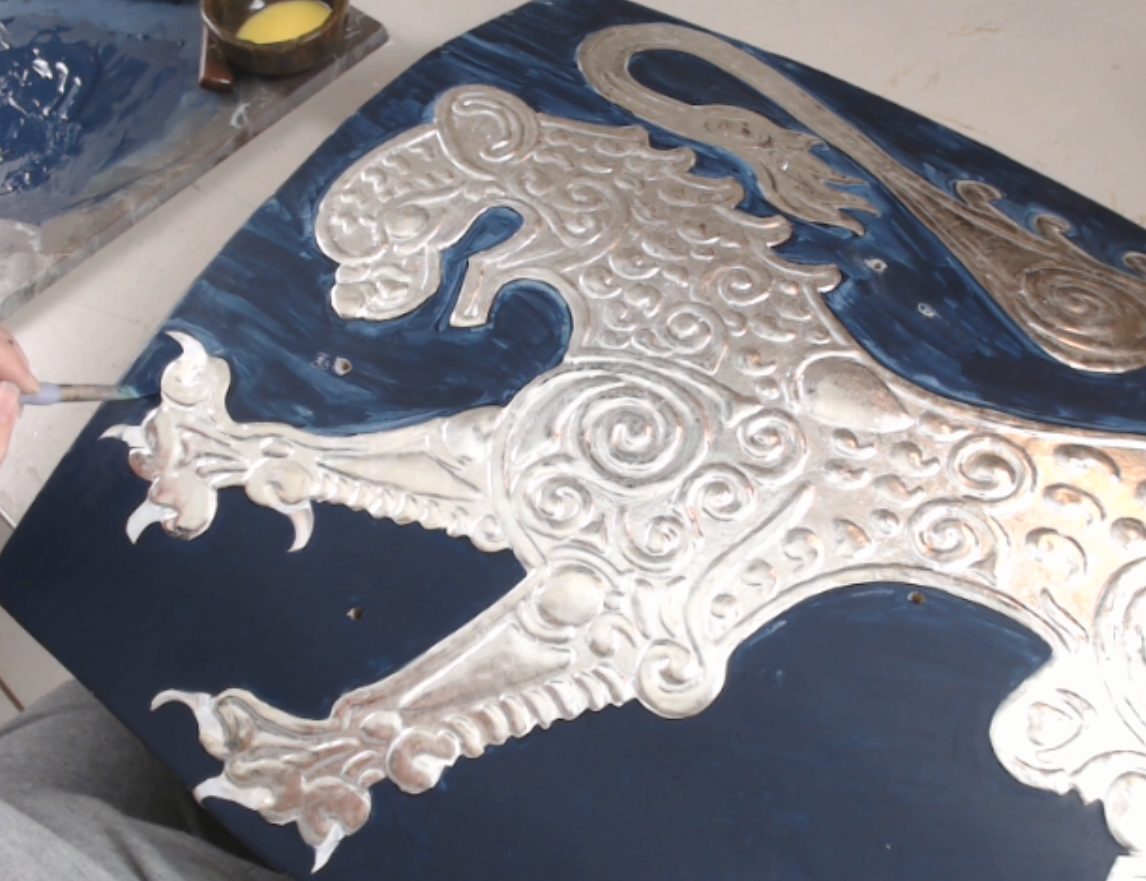
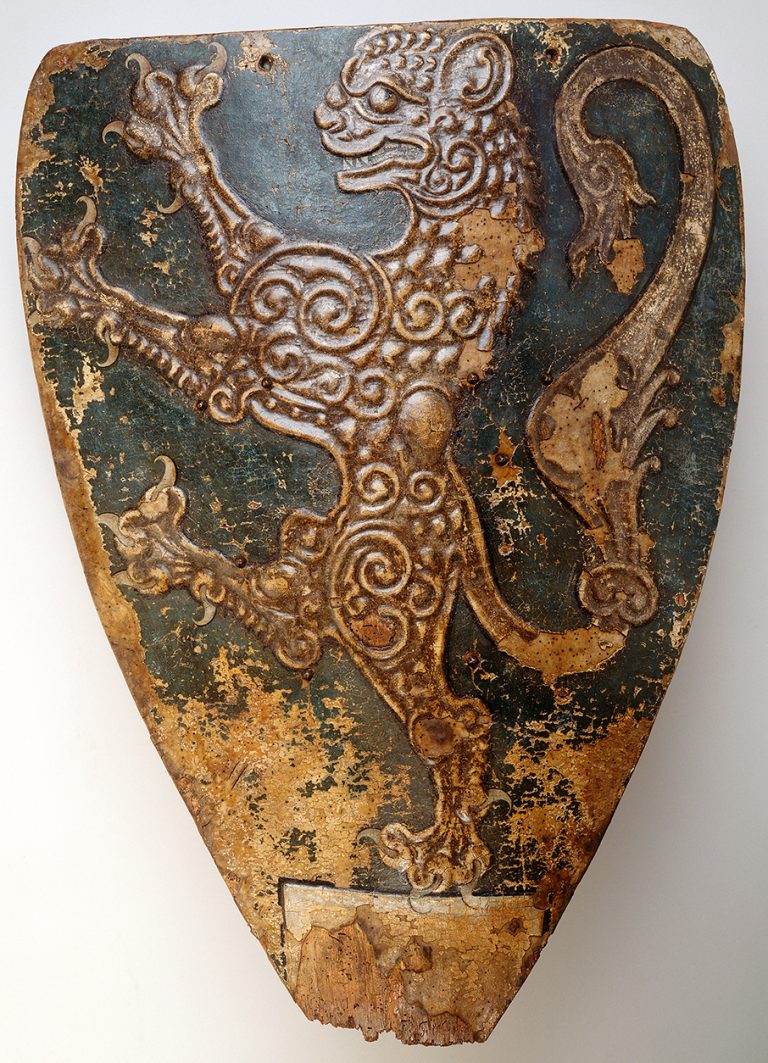
Heraldic shields were used on battlefields and tournament fields for hundreds of years, serving as both protection and identification for their respective owners. By the 13th and 14th Centuries, heater shapes with heraldic themes became popular across much of Europe. But heraldic shields were also used as a display of wealth and status. Not only were they used in combat, but also in processions, pageants, festivals, funerary displays and wall decor. These were beautifully painted and sometimes decorated with elaborate relief work and gilding.

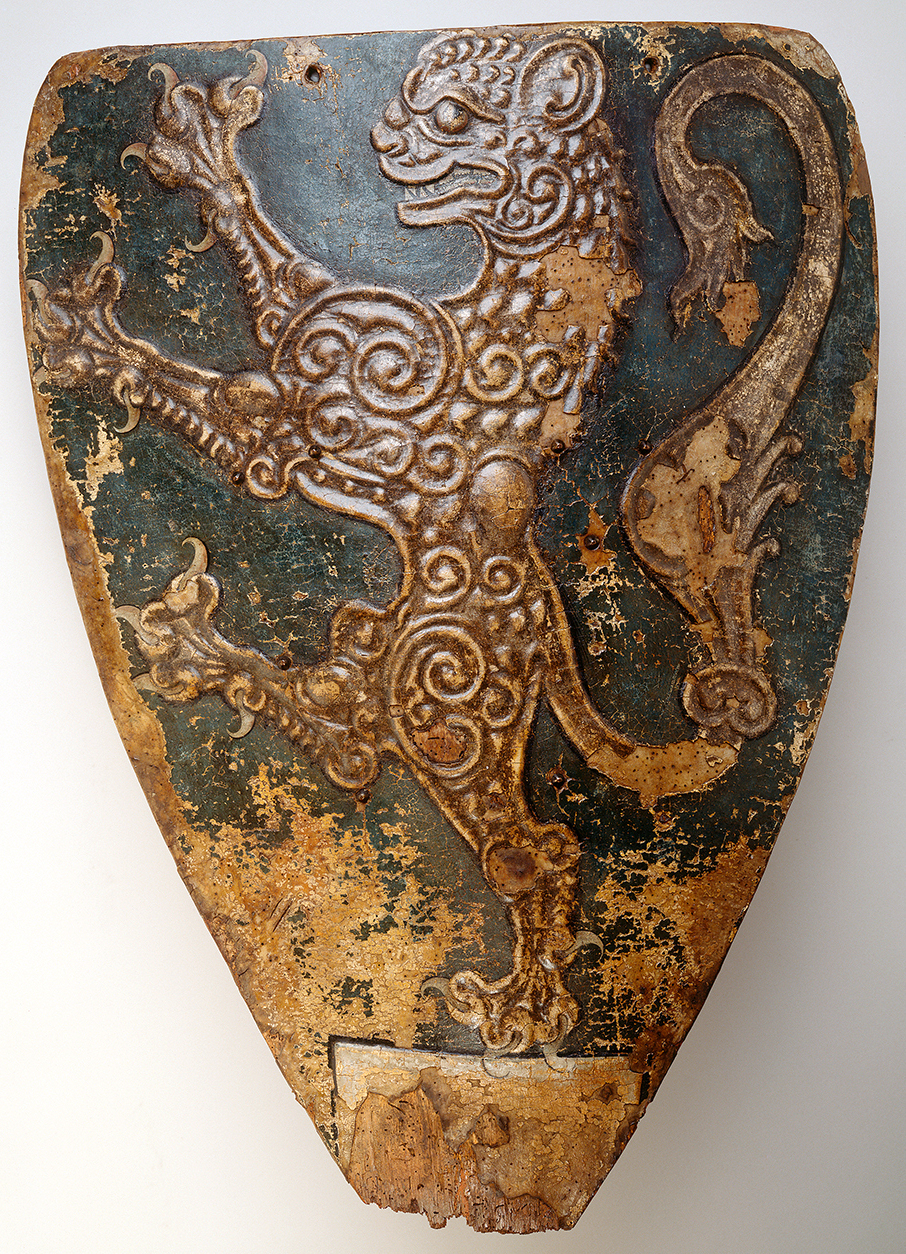
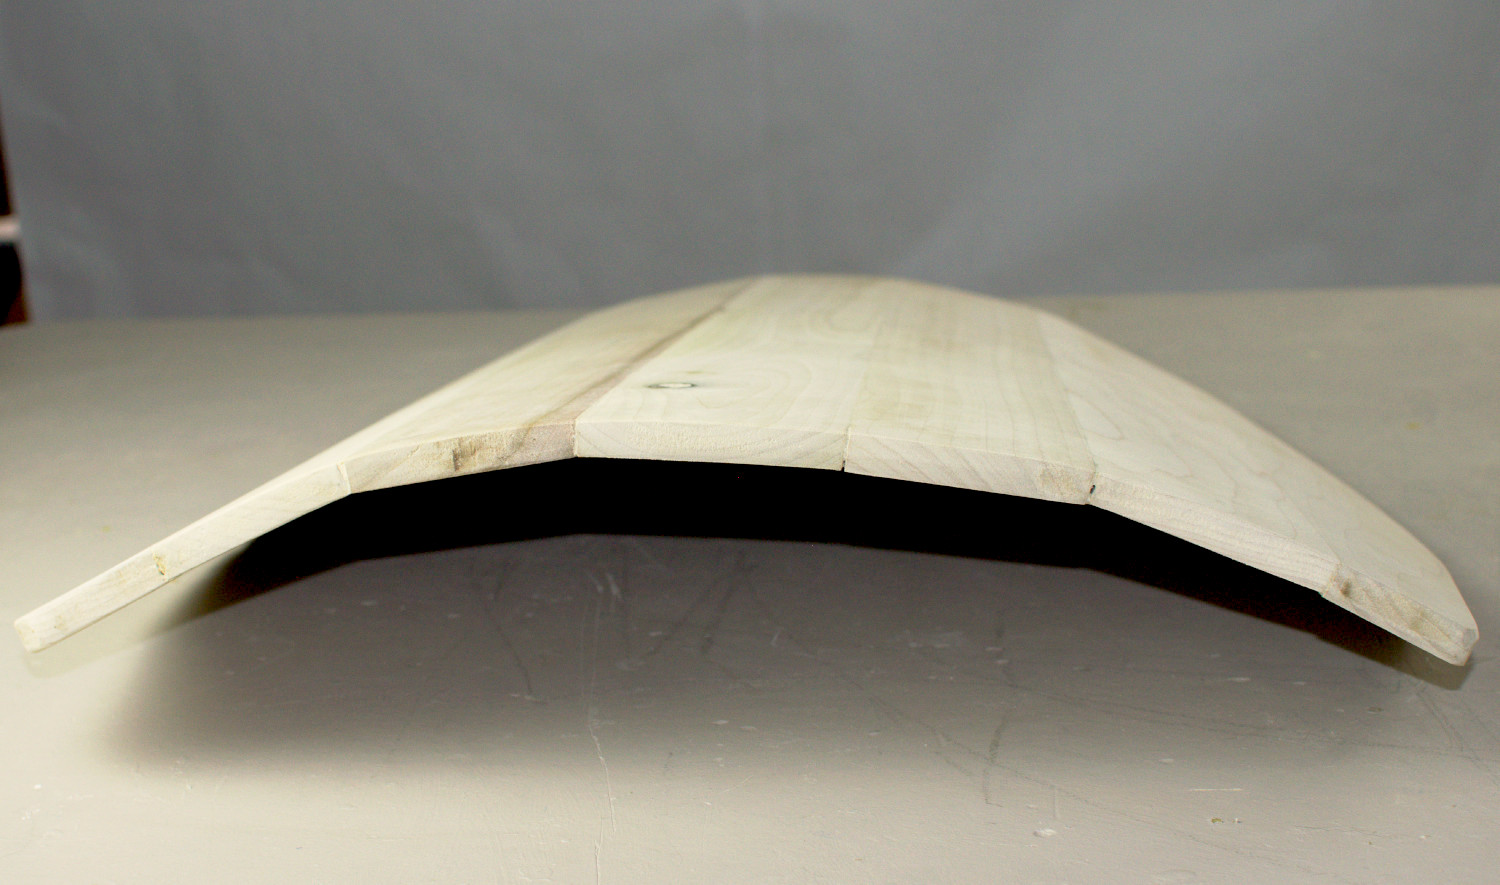
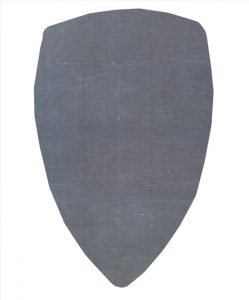
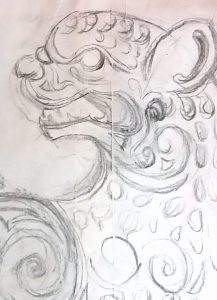
Inspiration. A selection of extant wooden heater shields from the 13th and 14th Centuries was chosen, each with heraldic design incorporating some form of relief work. Information on most of them is sparse, so precious clues on construction were cross-referenced among the various pieces on the group.

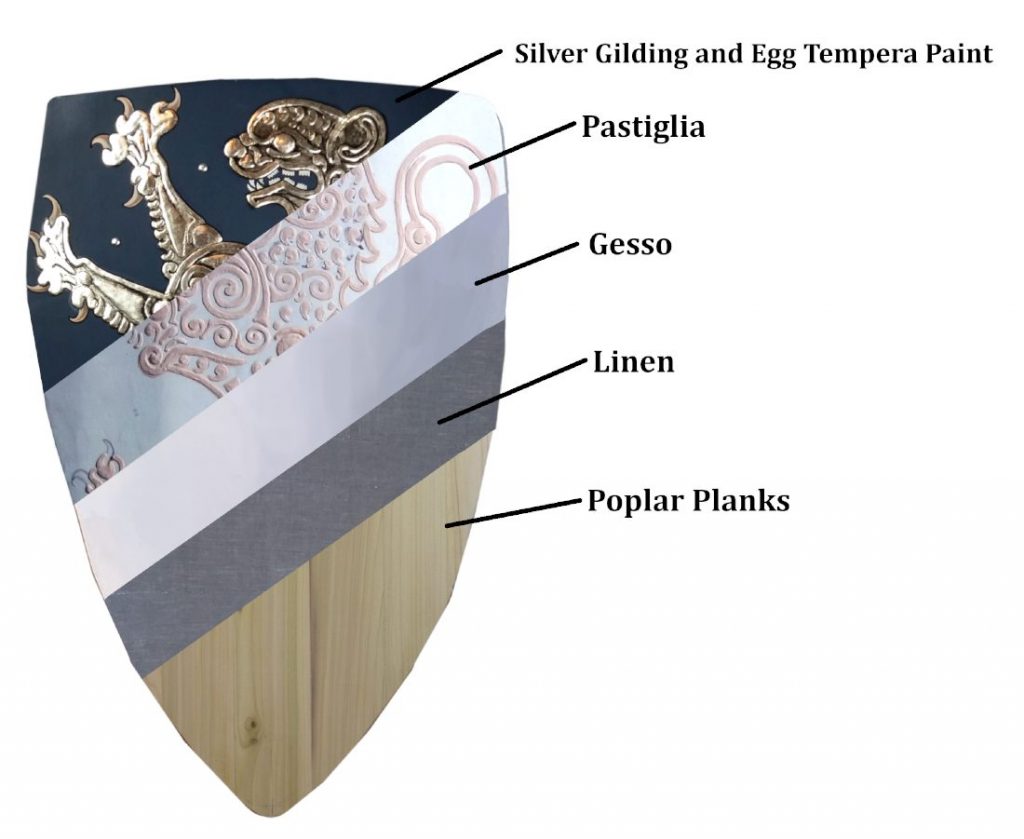
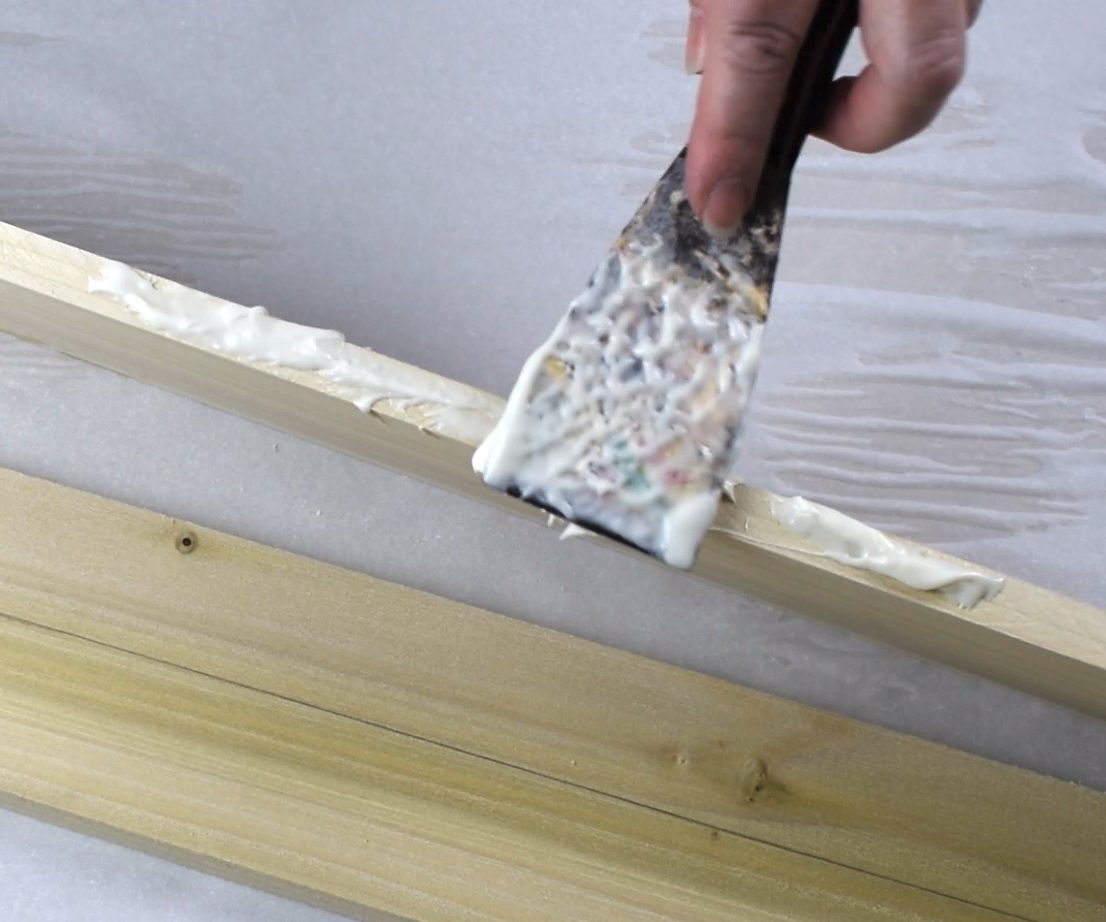
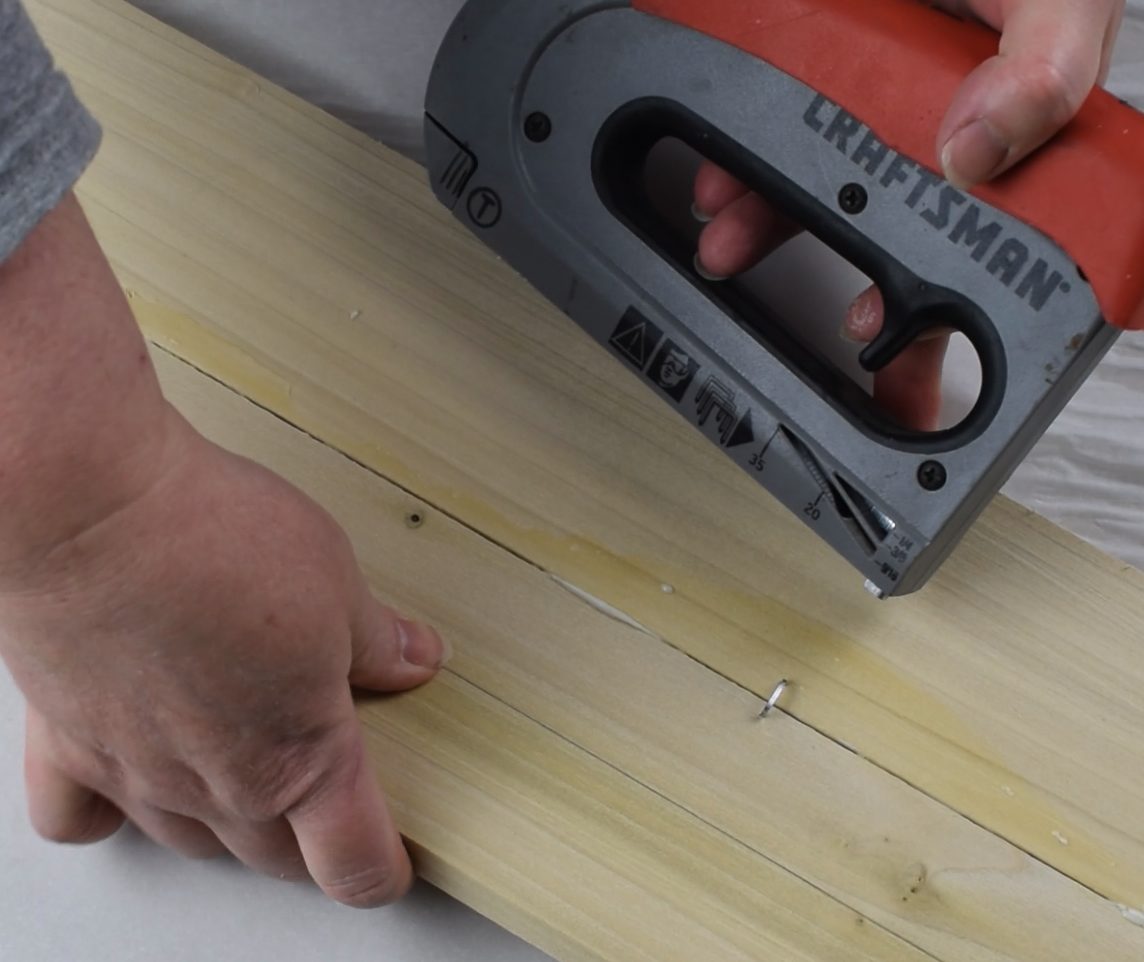
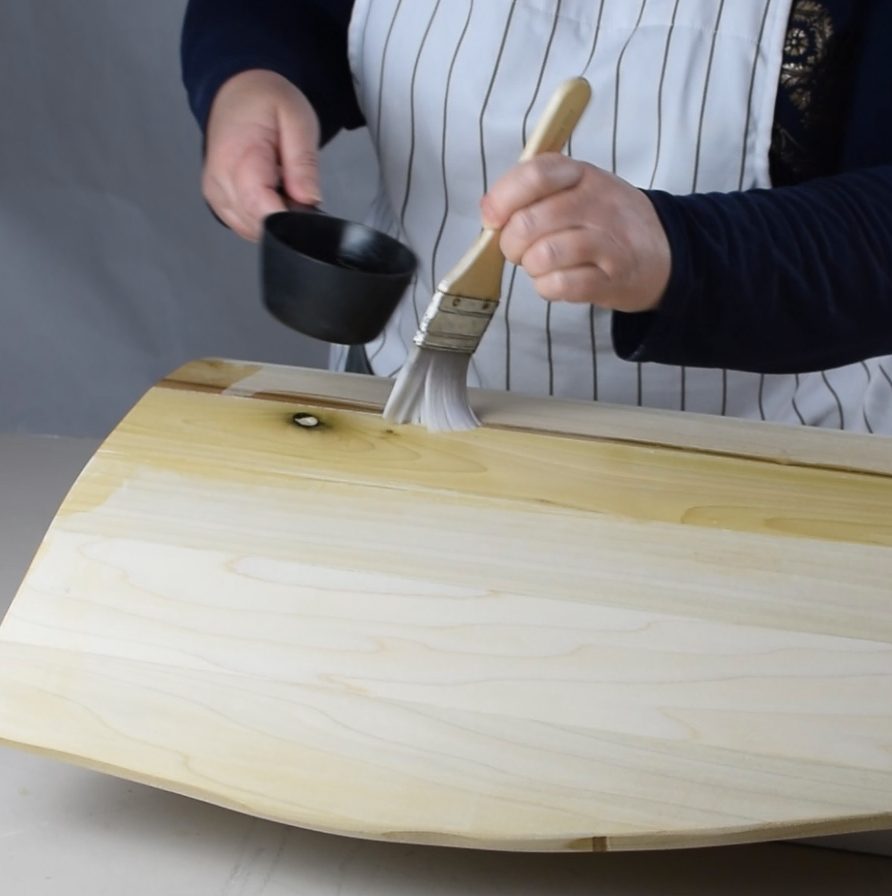
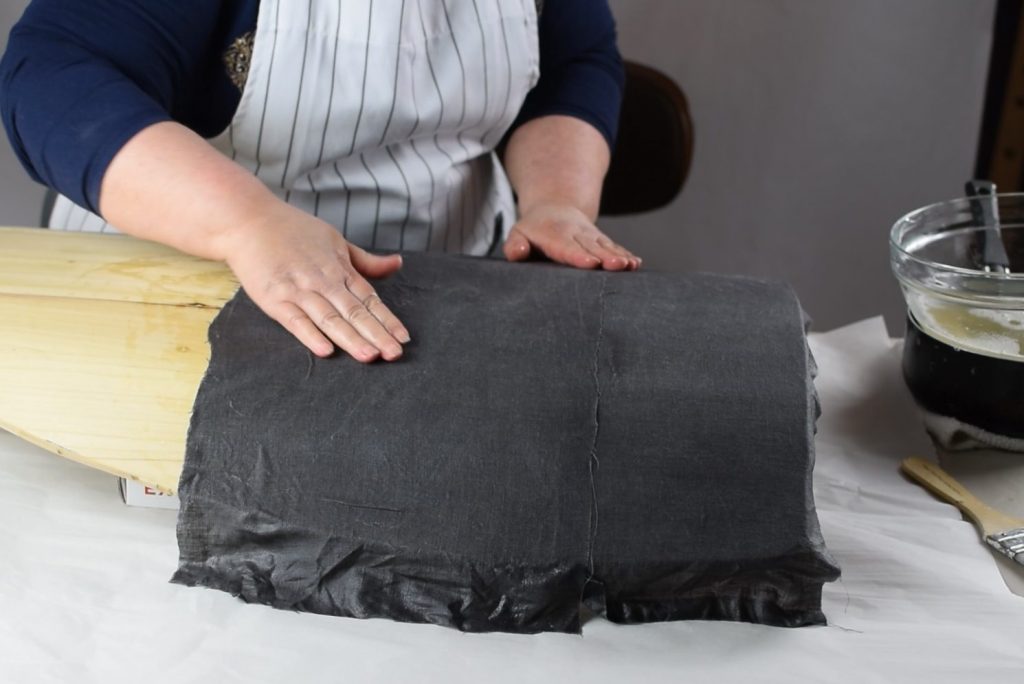
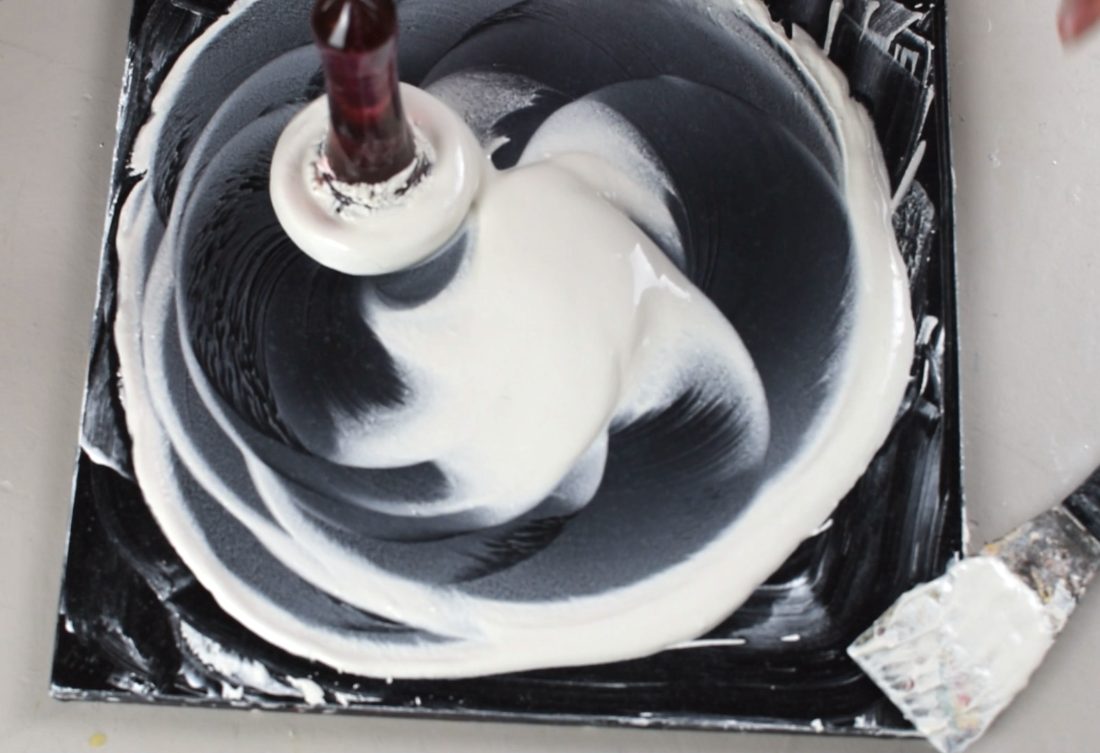
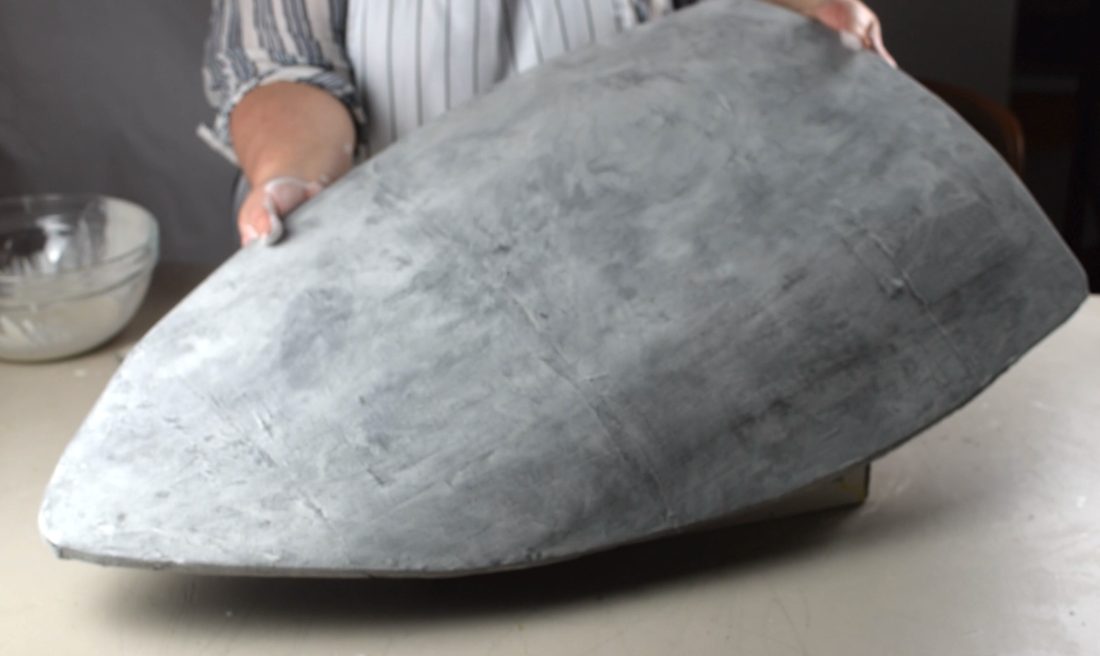
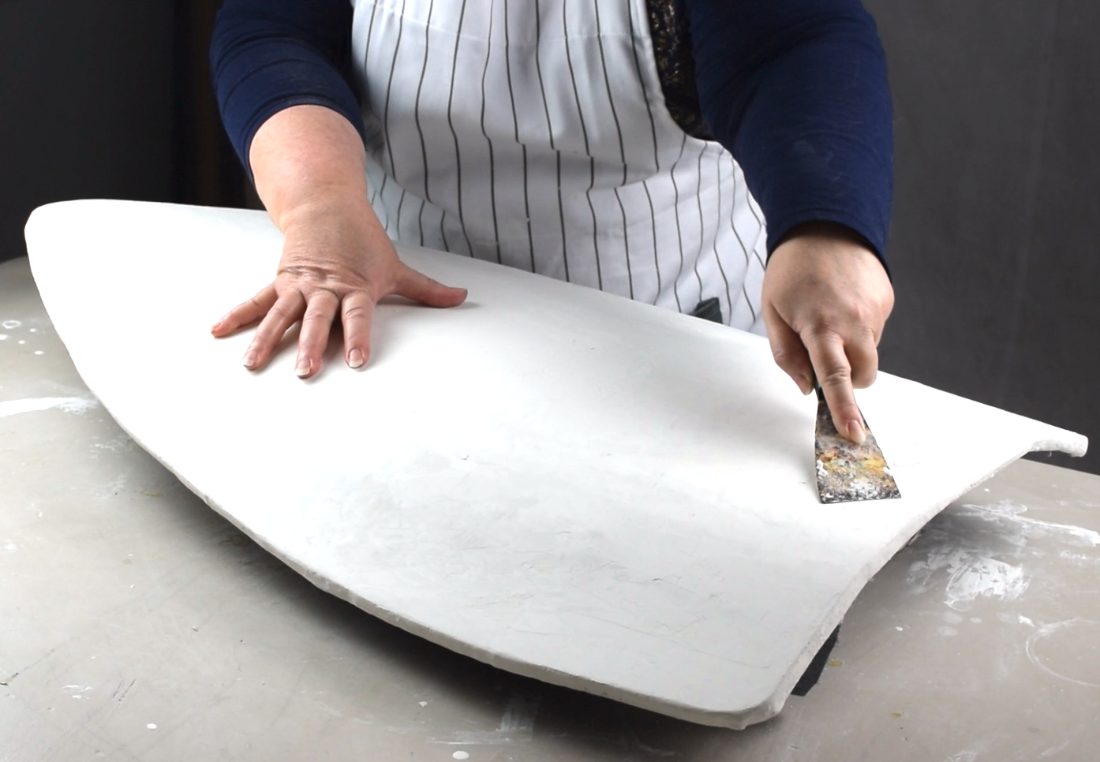
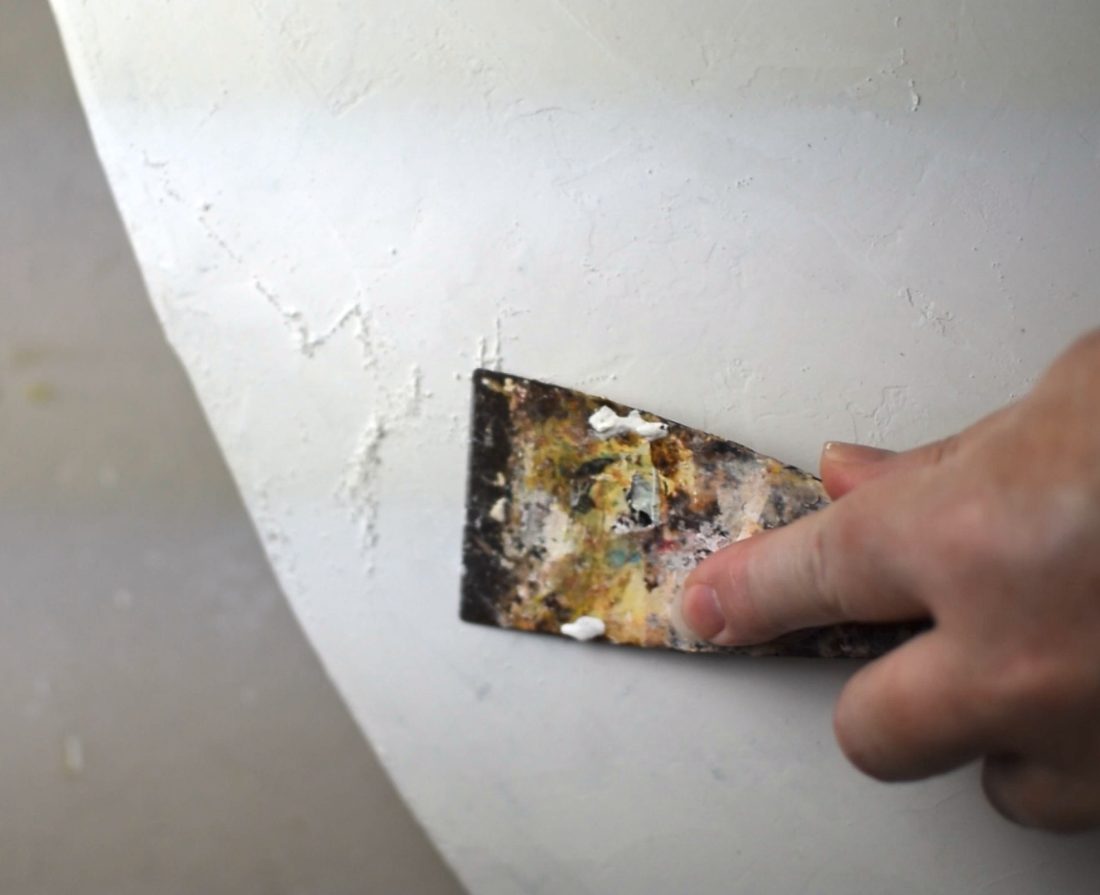
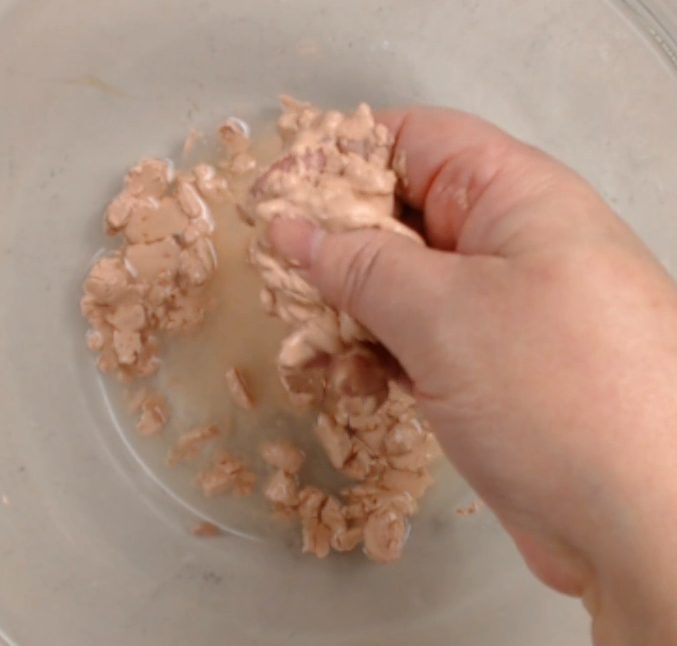
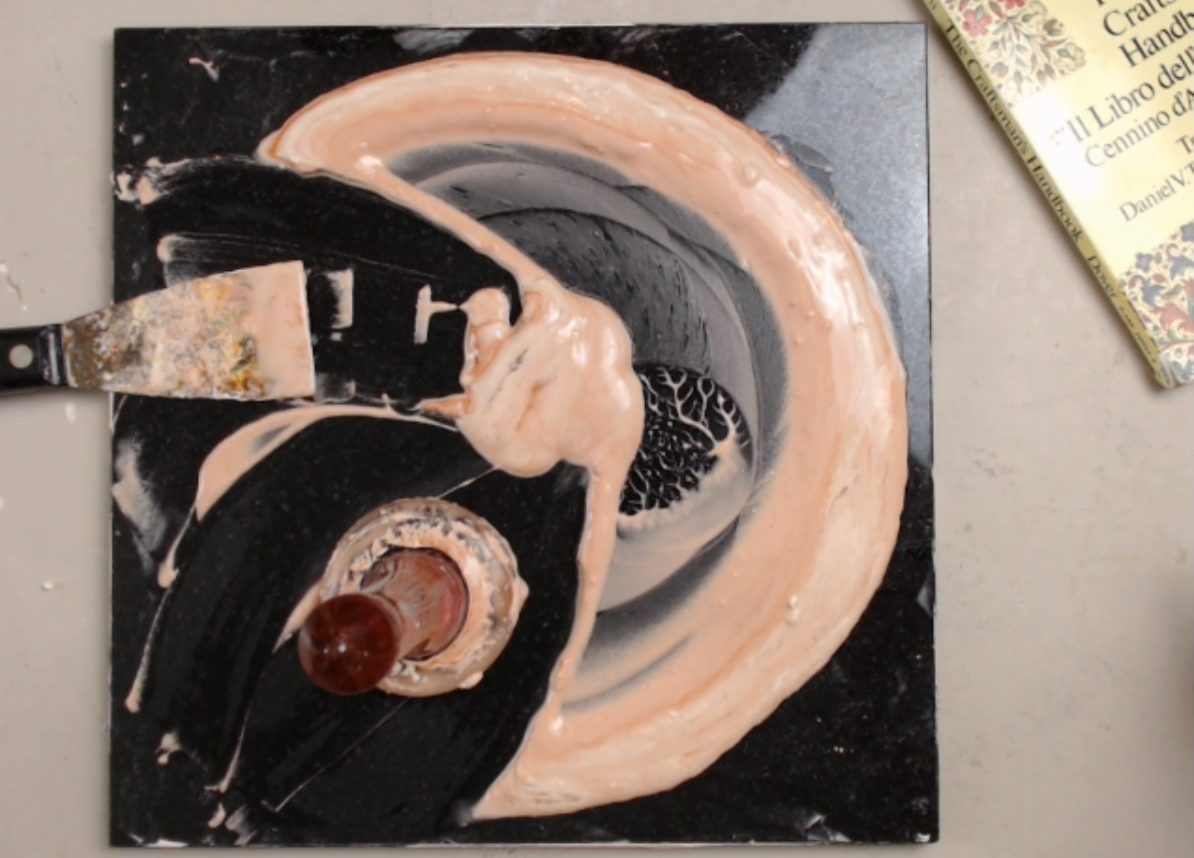
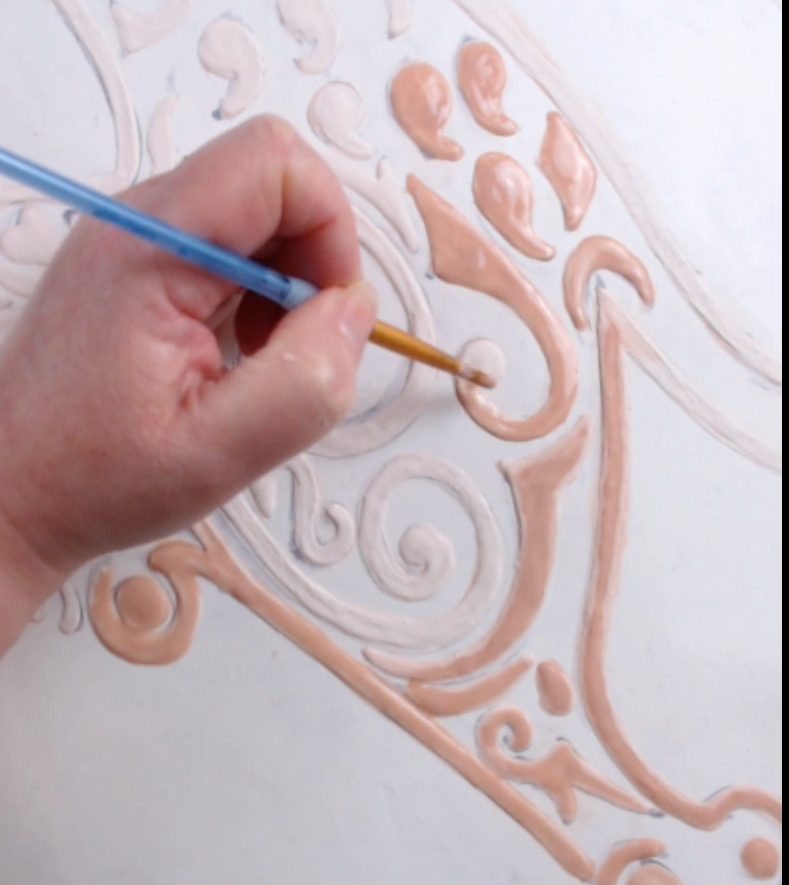
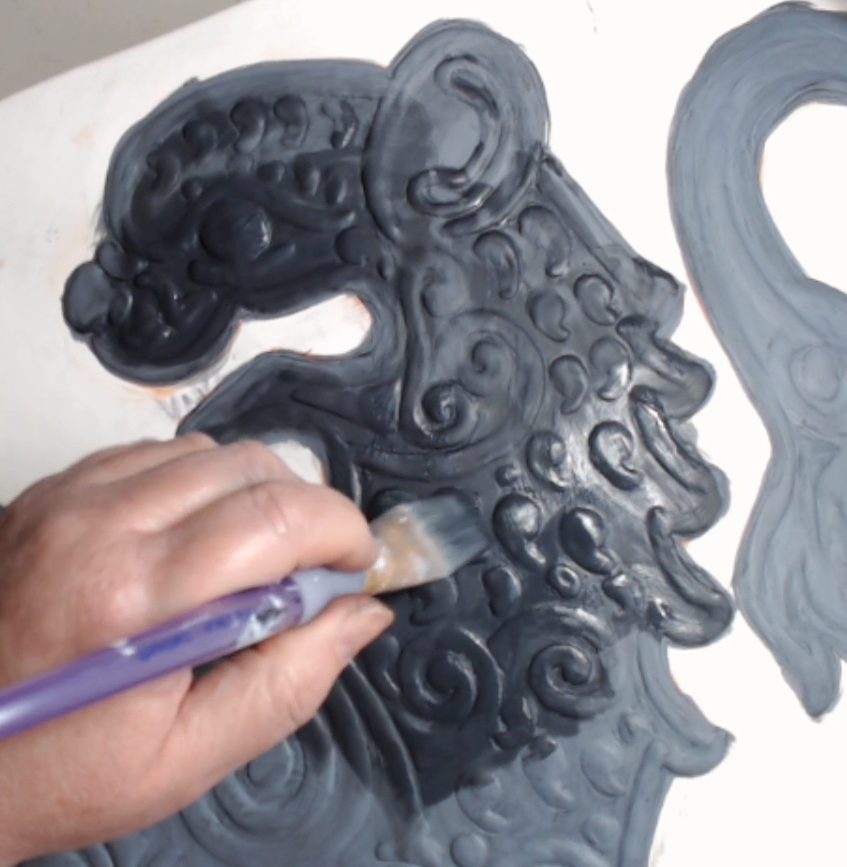
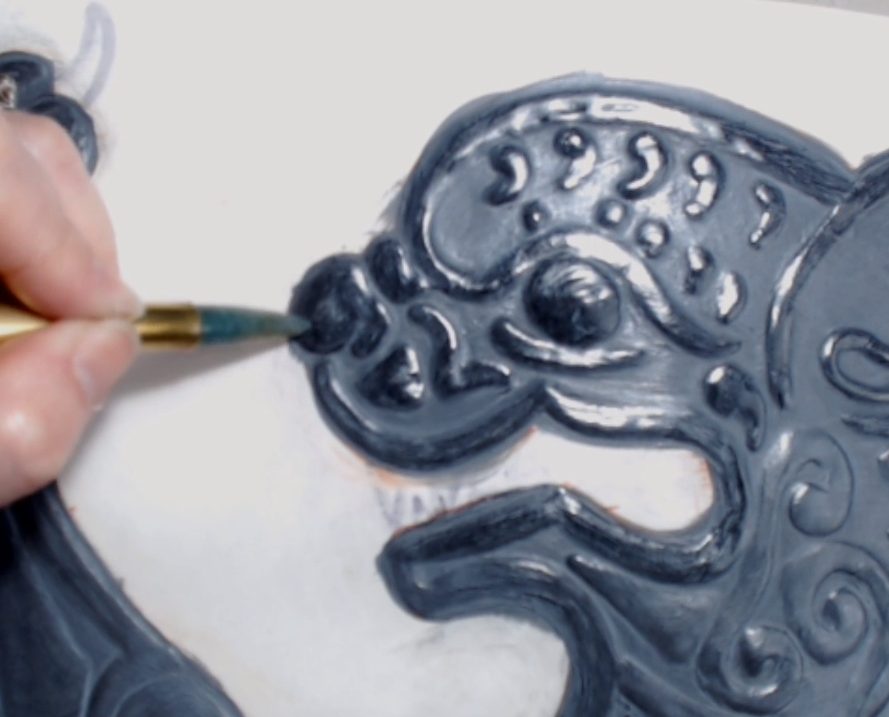
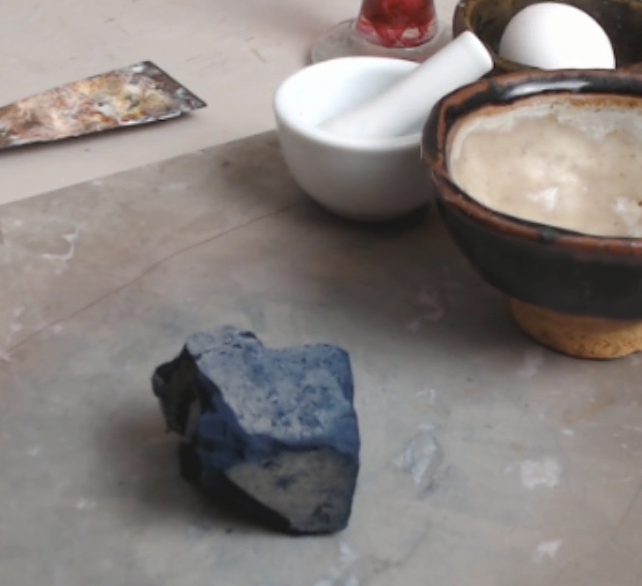
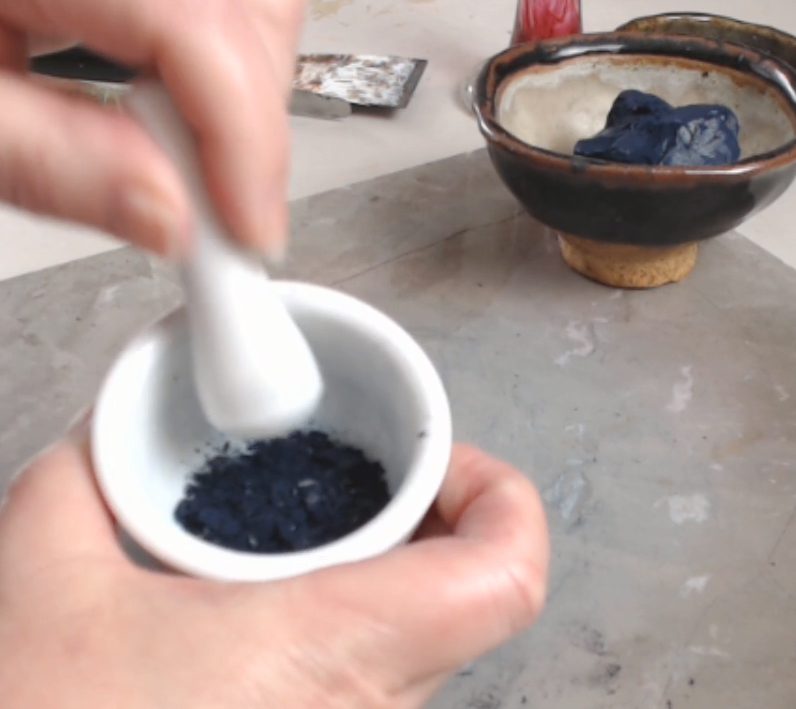
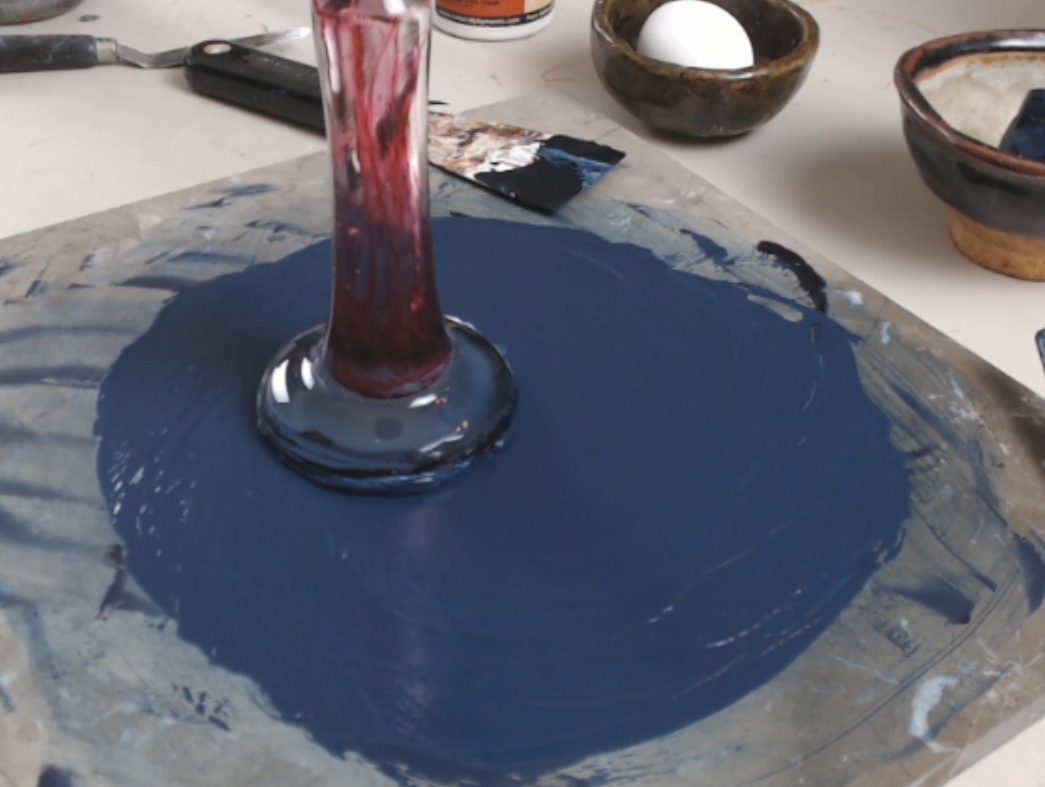
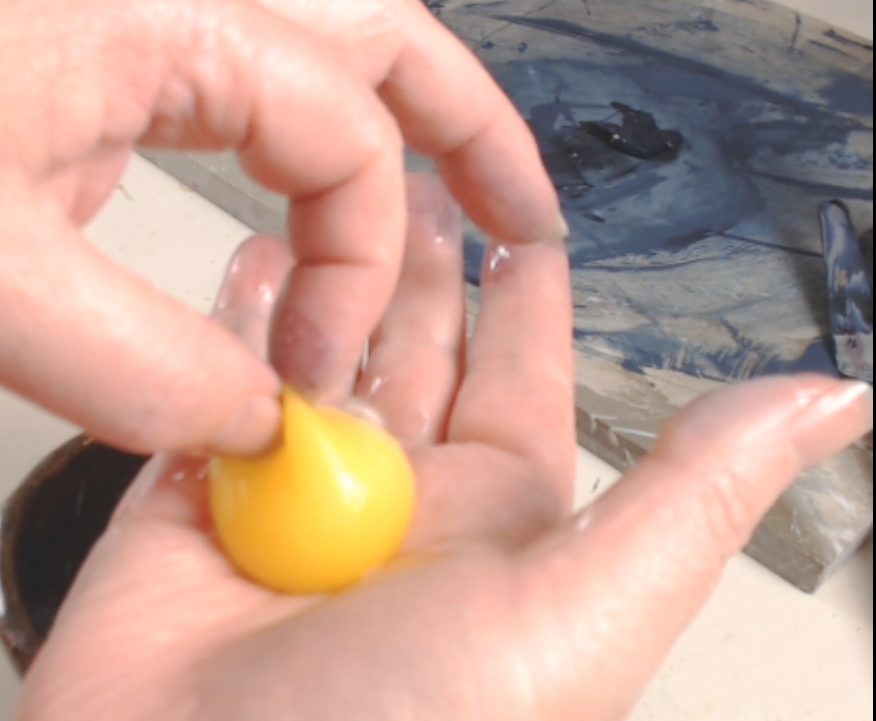
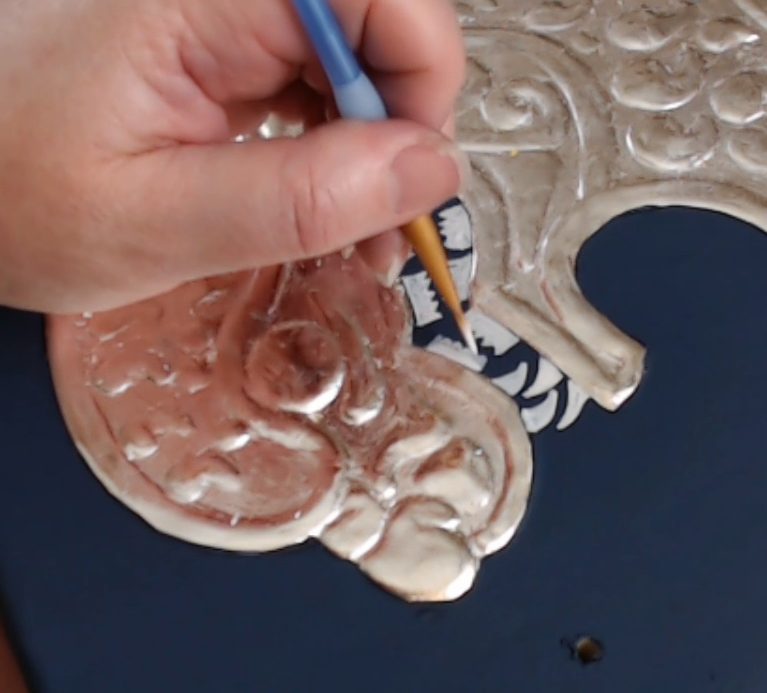
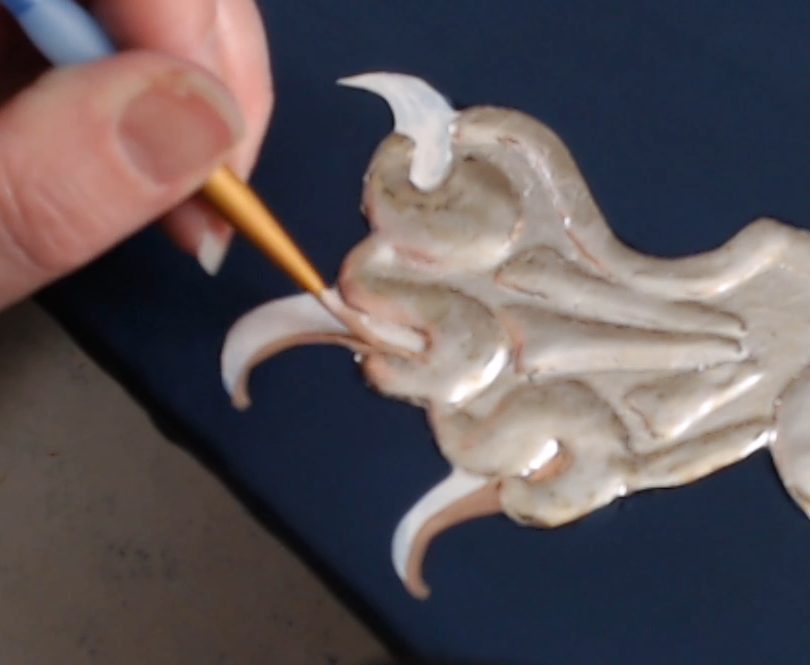
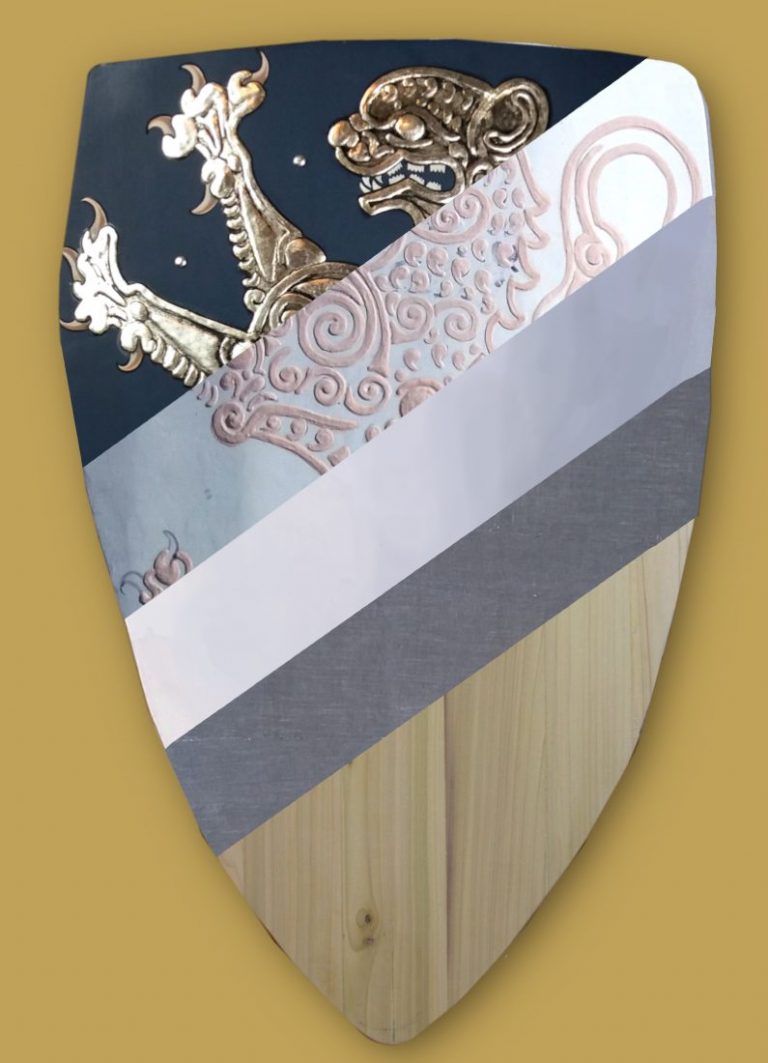
By studying many museums pieces, it is clear that this type of shield was made of wood layered in fabric and/or leather or parchment, gesso, relief work (in gesso, leather, or paper), gilding, and paint. I surmised that painted shields are very similar to panel painting as described by Cennini…wood, linen, gesso, gesso relief, gilding, paint.

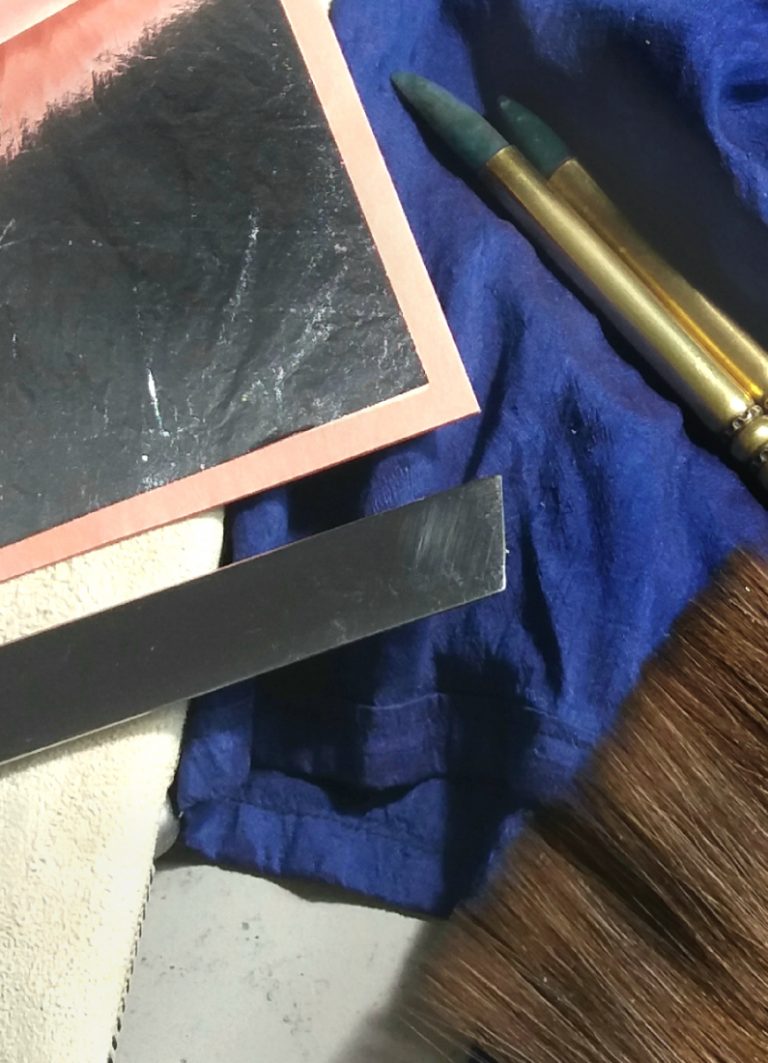
Although The Craftsman’s Handbook is considered to be written in 1437, one translator, Daniel V. Thompson, says it may have actually been written earlier. Cennini studied under Agnolo Gaddi in the 14th Century and his techniques are consistent with art made in that period. Therefore, I used Cennini’s instructions and recipes as a guide throughout this process.

Inspiration

Seedorf Shield of Sir Arnold von Bienz
Seedorf Shield, ca. 1200-20, Swiss

A selection of extant wooden heater shields from the 13th and 14th Centuries was researched, each with heraldic design incorporating some form of relief work. Information on most of them is sparse, so precious clues on construction were cross-referenced among the various pieces on the group.      

In keeping with the fashion of the period, a curved heater shape was chosen to be decorated with the heraldic device of the recipient. The Swiss 13th Century Seedorf shield was chosen as the design inspiration, bearing the arms of Sir Arnold on Beinz. (Note that this is not meant to be an exact copy of the Seedorf shield, with it’s relief work probably done in molded leather.) 

I love the elegant stylized lion rampant, and copying an existing period design eliminated the distraction of creative decisions. This allowed me to focus on the many technical aspects that I knew would be challenging, since I was new to skills such as building plank shields, making glue, pastiglia, and water gilding.

Building the Shield Blank

 Let it be known that my woodworking experience and range of
tools are limited. However, I built the blank myself, largely as an excuse to try Cennini’s
lime & cheese glue recipe.

Poplar planks, 3” wide x 1/2” thick were beveled to 8 degrees along the length to form
the curvature. Cennini’s lime and cheese glue, made from mozzarella and slaked lime
was used to join the planks.

As this was a very experimental project, staples were used to hold the planks together
while drying as a means of avoiding having to build a new shield press. I probably
wouldn’t do this again, but, after several attempts, it did awkwardly manage to come
together. Once dry, the shield blank was sanded smooth with a power sander.

Prepping the Blank. Cracks and knot holes were filled with a paste of sawdust and
rabbit skin glue.1 Two layers of weak size of rabbit Skin glue glue thinned with water,
then 2 coats of strong size were applied to seal the wood and prepare it to accept the next
layer. 2

Plank Shield - Curved Heater

Linen Layer

 Strips of 5 oz. linen were soaked in rabbit skin glue and applied on front and back, smoothing it out as much as possible.

Once dry, the shield was strengthened immensely, much to my surprise. 

Applying Linen to the Medieval Plank Shield

Gesso

Slaked plaster was made using Cenini’s method of purifying Plaster of
Paris by soaking and pouring off the water for a whole month. 4 The slaked plaster was
then strained and dried in loaves until ready to use.

When the time came to make gesso sottile, the slaked plaster loaves were soaked in
water, then ground with a glass muller on a granite slab. The resulting smooth, creamy
substance was once again strained through linen cloth, forming wet loaves. These loaves
were sliced thinly and laid out in a dish, then covered in rabbit skin glue. With my
fingers, the slices were gently squished, allowing the hide glue to thoroughly blend,
creating a creamy consistency. 

Although Cennini suggests using gesso grosso for the first layers, he also mentions thatgrosso is not required, stating that sottile may be used alone for choice projects.6Ten layers were applied with a 3” putty knife or spatula.7 Once dry, the surface wasscraped down with the spatula, then lightly burnished with a damp linen rag to create a smooth texture. No sanding was required.

Gesso Layer of Heraldic Parade Shield

Making the Cartoon

Underdrawing for Heraldic Parade Shield Inspired by the Seedorf Shield

Although the drawing could have been done directly on the gesso using
charcoal, I chose to use a cartoon to work out the details of the design and avoid
making a mess of my beautiful clean, white gesso. Sheets of sketch paper were fastened together using Cennini’s flour paste recipe9 to create a full size cartoon. Once dry, the design was executed in vine charcoal, then fixed in ink. The design was transferred to the shield and once again fixed in ink, with a little shading to help me visual the relief areas to come.

Sketch in Charcoal

Pastiglia

The 3-dimensional effect was built up with gesso sottile, or “pastiglia”.  More gesso sottile was made, this time adding a little Armenian bole for color. The relief areas were delicately built up in many delicate layers using a brush. Once dry, a knife was used to scrape imperfections. Areas were further shaped and smoothed using a damp linen rag to achieve the pillow-y effect I was after.

Pastiglia Layer of Heraldic Parade Shield Inspired by the Seedorf Shield

Bole

Bole. Four layers of black bole mixed with white of egg, or glair, were applied to the
areas to be gilt, each coat stronger than the last. Once dry, imperfections and foreign matter were scraped with a knife. The bole was then burnished with a linen rag. The raised areas were also burnished with an agate burnisher to further increase the shine.

Gilding

 Working in sections, a gilder’s liquor made of white of egg and water was
laid with a brush. Genuine silver leaf was then laid, section by section using a squirrel tip brush and gently patting with a cotton ball. After about an hour, the leaf was burnished with an agate burnisher

Painting

 Though the museums housing my inspiration pieces do not specify the type of paint used, I felt it was a reasonable assumption that egg tempera could have been used, based on Cennini’s instruction for panel painting. Pigments were crushed and ground with a muller on a marble slab with water until it reached a smooth consistency. Egg yoke and water were added to make the paint which was built up in layers to achieve proper coverage.

The background color is Indigo mixed with Titanium White (a modern pigment in place of the toxic Lead White suggested by Cennini for shields). Titanium white was used for the teeth and claws, with a mixture of Burnt Sienna, Titanium White and Ivory Black for the shading. Finally, Ivory Black was used for the outline.

I felt the silver gilding needed some definition, so I decided to give it a bit of an antique look. I have no documentation for using such an effect. This was purely my own indulgent whim. It was achieved with an isolation layer of clear shellac, then a layer of Ivory Black egg tempera, which was buffed off with rag, leaving only traces of black in the creases and crevices. 

Finishing

Cennini warns against any type of varnish for gilding. But since this is a
functional item intended to be handled and used, I felt a protective coating was
important. Clear shellac was applied to both the gilt and painted areas after curing for 2 months.
Backing. Shields of this type were most likely backed in leather. However, since this was an experimental project and leather is expensive, I opted for a black cotton velveteen lining instead. Due to problems with achieving the desired neat, smooth finish, spray glue was used to attach a canvas interlining and mounting the backing to the shield. The edges are finished with black metal nail heads.
Strapping. The leather arm pad is interlined with 2 layers of heavy wool and mounted with black metal nail heads. The leather criss-cross handle and buckled leather strapping are mounted with traditional solid rivets.

FINITO!!

While it took months of work and struggle at nearly every
stage, I achieved my objective, which was to learn the skills required
to make a Heraldic Parade Shield in relief that might have existed in
the 13th-14th Centuries. I now have a much better understanding of
the process and feel ready to pursue the next shield.

Materials & Techniques

Progress

Watch the Video